Today was the second time I had to remove a paper jam from the bakery’s Canon Faxphone L80. There was very little in the way of online documentation on disassembly, so I thought I would add to the public knowledge about taking apart a Canon Faxphone L80 laserprinter, fax, and complex plastic thingy. These instructions will show you how to remove the parts surrounding the Canon Faxphone L80’s fuser assembly and take out the bit of tattered paper inside.
Okay, got that Google? Now let’s begin.
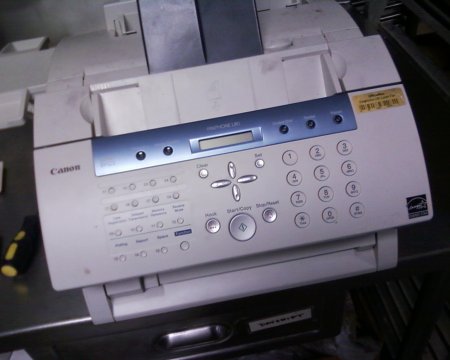
Here is the Canon Faxphone L80. You start by removing all the cords and cables from the back and unplugging the handset. Take off all the paper trays and guides. Consider using one of these as a tray for holding all the screws you will soon have rolling around.
Now, open up the hinged front, there’s a latch at the top. Take out the toner cartridge while you’re at it.
Next, there are four screws that hold the outer plastic shell to the frame. Two of them are marked here, you can find the other two by inference. Once the screws are out, you can lift the shell right off.
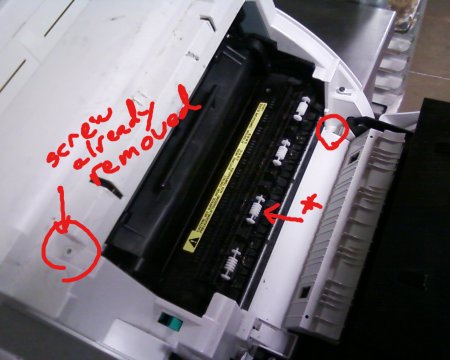
Also take note of the (*). Those white plastic rollers will pop off and fling their spring across the room if you’re not careful. Avoid jostling them!
Now that we’ve got the case off, we might as well work on that hinged document loader thingy. On the lower right you will find a clear peg that holds the door/loader hinge in place. Pull that out, and the assembly slides off once you push it to the right. Be careful of the cords.
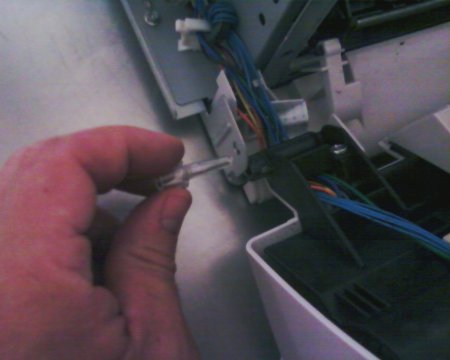
You don’t need to take the hinged loader thingy off the cables, that would take too much work. Just move it to the side where it’s out of the way. Careful with the wires!
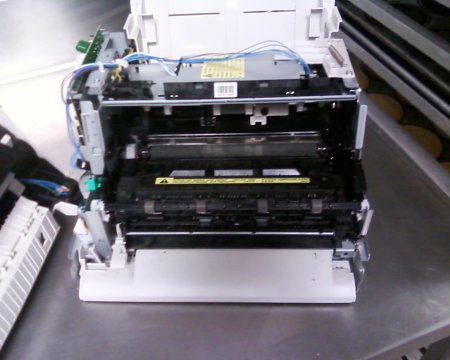
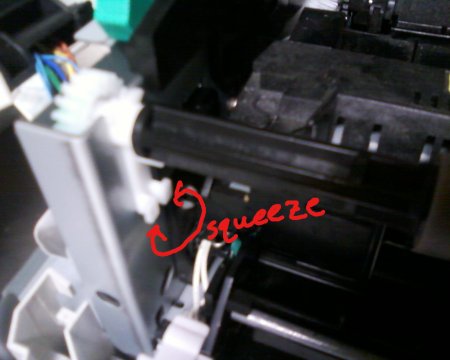
Now let’s take off that rotating bar that goes along the front. There’s white clips just under the point where the bar makes contact with the frame. Gently squeeze the tabs on the clips and rotate the clips toward you. The bar should lift right off.
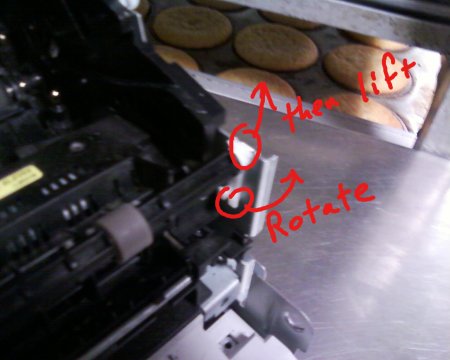
Can you spot Jeremiah’s white cupcakes in this picture?
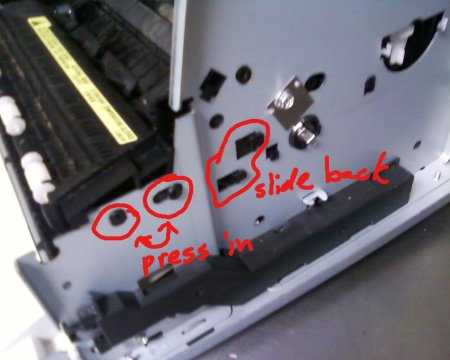
Now we can get to the nitty gritty of popping off the fuser rollers. There’s black plastic guides clipped to the side of the frame that will prevent you from removing the fuser (the complex piece of machinery that’s hiding the paper jam). They’re only there as guides for the toner cartridge, but they physically block removing anything from the Canon Faxphone L80’s guts. They’re not attached by screws, or anything sensible like that. There’s a series of tabs and slots and it’s not at all intuitive how to remove it. It took me thirty minutes the first time to figure it out. But you can benefit from my frustration. Push in on the two round pegs, and then slide the assembly toward you. Actually, what I did was push at things and jiggled until something popped out.
Kinda looks like a happy face, don’t it?
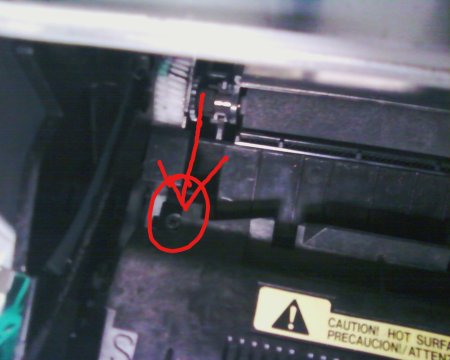
Now we remove the screws that are actually holding down the fuser. There’s two of them, and they’re positioned in such a way that all of your Phillips head screwdrivers will either be way too short or just a little too long to fit into the space. The first time there was a paper jam, the office manager started by removing these screws and then promptly dropped one of them into the guts of the laser printer, never to be seen again. You may want to use a screwdriver with a magnetized head.
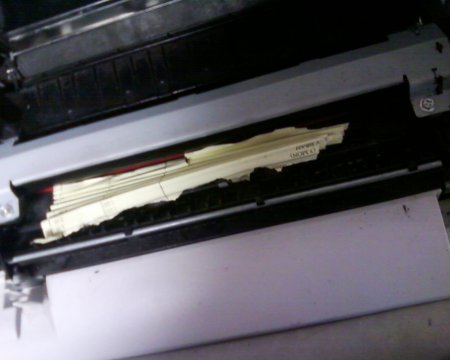
Now the fuser will lift right off, revealing that bastard piece of paper that accordioned itself where no coathanger or needlenose plier could extract it.
Good luck getting everything back together! I hope you didn’t lose any screws. We’ve been averaging one lost screw every time I disassemble the Canon Faxphone L80.
2 Responses to How to Remove a Paper Jam From a Canon Faxphone L80